注意
点击 这里 下载完整示例代码
媒体流 API - 第 2 部分
本教程是 媒体流API - 第一部分的延续。
这展示了如何使用 StreamReader 进行
设备输入,如麦克风、网络摄像头和屏幕录制
生成合成音频 / 视频
应用自定义过滤表达式的预处理
import torch
import torchaudio

print(torch.__version__)
print(torchaudio.__version__)
Out:
1.12.0
0.12.0
try:
    from torchaudio.io import StreamReader
except ModuleNotFoundError:
    try:
        import google.colab

        print(
            """
            To enable running this notebook in Google Colab, install nightly
            torch and torchaudio builds and the requisite third party libraries by
            adding the following code block to the top of the notebook before running it:

            !pip3 uninstall -y torch torchvision torchaudio
            !pip3 install --pre torch torchaudio --extra-index-url https://download.pytorch.org/whl/nightly/cpu
            !add-apt-repository -y ppa:savoury1/ffmpeg4
            !apt-get -qq install -y ffmpeg
            """
        )
    except ModuleNotFoundError:
        pass
    raise

import IPython
import matplotlib.pyplot as plt

base_url = "https://download.pytorch.org/torchaudio/tutorial-assets"
AUDIO_URL = f"{base_url}/Lab41-SRI-VOiCES-src-sp0307-ch127535-sg0042.wav"
VIDEO_URL = f"{base_url}/stream-api/NASAs_Most_Scientifically_Complex_Space_Observatory_Requires_Precision-MP4.mp4"
音频 / 视频设备输入
鉴于系统具备适当的媒体设备,并且 libavdevice 被配置为使用这些设备,流媒体 API 可以从这些设备中拉取媒体流。
要实现这一点,我们向构造函数传递额外的参数 format 和 option
。 format 指定设备组件,
option 字典特定于指定的组件。
要传递的确切参数取决于系统配置。 请参阅 https://ffmpeg.org/ffmpeg-devices.html 以获取详细信息。
以下示例说明了如何在 MacBook Pro 上执行此操作。
首先,我们需要检查可用的设备。
$ ffmpeg -f avfoundation -list_devices true -i ""
[AVFoundation indev @ 0x143f04e50] AVFoundation video devices:
[AVFoundation indev @ 0x143f04e50] [0] FaceTime HD Camera
[AVFoundation indev @ 0x143f04e50] [1] Capture screen 0
[AVFoundation indev @ 0x143f04e50] AVFoundation audio devices:
[AVFoundation indev @ 0x143f04e50] [0] MacBook Pro Microphone
我们使用 FaceTime HD Camera 作为视频设备(索引 0),并使用 MacBook Pro Microphone 作为音频设备(索引 0)。
如果我们不传递任何 option,设备将使用其默认
配置。解码器可能不支持该配置。
>>> StreamReader(
...     src="0:0",  # The first 0 means `FaceTime HD Camera`, and
...                 # the second 0 indicates `MacBook Pro Microphone`.
...     format="avfoundation",
... )
[avfoundation @ 0x125d4fe00] Selected framerate (29.970030) is not supported by the device.
[avfoundation @ 0x125d4fe00] Supported modes:
[avfoundation @ 0x125d4fe00]   1280x720@[1.000000 30.000000]fps
[avfoundation @ 0x125d4fe00]   640x480@[1.000000 30.000000]fps
Traceback (most recent call last):
  File "<stdin>", line 1, in <module>
  ...
RuntimeError: Failed to open the input: 0:0
通过提供 option,我们可以将设备流式传输的格式更改为解码器支持的格式。
>>> streamer = StreamReader(
...     src="0:0",
...     format="avfoundation",
...     option={"framerate": "30", "pixel_format": "bgr0"},
... )
>>> for i in range(streamer.num_src_streams):
...     print(streamer.get_src_stream_info(i))
SourceVideoStream(media_type='video', codec='rawvideo', codec_long_name='raw video', format='bgr0', bit_rate=0, width=640, height=480, frame_rate=30.0)
SourceAudioStream(media_type='audio', codec='pcm_f32le', codec_long_name='PCM 32-bit floating point little-endian', format='flt', bit_rate=3072000, sample_rate=48000.0, num_channels=2)
合成源流
作为设备集成的一部分,ffmpeg 提供了一个“虚拟设备”接口。该接口使用 libavfilter 生成合成的音频/视频数据。
要使用此功能,我们设置 format=lavfi 并向 src 提供一个滤波器描述。
有关滤镜描述的详细信息可以在 https://ffmpeg.org/ffmpeg-filters.html
音频示例
正弦波
https://ffmpeg.org/ffmpeg-filters.html#sine
StreamReader(src="sine=sample_rate=8000:frequency=360", format="lavfi")
信号与任意表达式
https://ffmpeg.org/ffmpeg-filters.html#aevalsrc
# 5 Hz binaural beats on a 360 Hz carrier
StreamReader(
    src=(
        'aevalsrc='
        'sample_rate=8000:'
        'exprs=0.1*sin(2*PI*(360-5/2)*t)|0.1*sin(2*PI*(360+5/2)*t)'
    ),
    format='lavfi',
 )

噪声
https://ffmpeg.org/ffmpeg-filters.html#anoisesrc
StreamReader(src="anoisesrc=color=pink:sample_rate=8000:amplitude=0.5", format="lavfi")
视频示例
细胞自动机
https://ffmpeg.org/ffmpeg-filters.html#cellauto
StreamReader(src=f"cellauto", format="lavfi")
曼德博罗
https://ffmpeg.org/ffmpeg-filters.html#cellauto
StreamReader(src=f"mandelbrot", format="lavfi")
MPlayer 测试图案
https://ffmpeg.org/ffmpeg-filters.html#mptestsrc
StreamReader(src=f"mptestsrc", format="lavfi")
谢尔宾斯基地毯/三角形分形
https://ffmpeg.org/ffmpeg-filters.html#sierpinski
StreamReader(src=f"sierpinski", format="lavfi")
自定义过滤器
定义输出流时,您可以使用
add_audio_stream() 和
add_video_stream() 方法。
这些方法接受 filter_desc 个参数,该参数是一个字符串
格式符合 ffmpeg 的
滤镜表达式。
add_basic_(audio|video)_stream 和
add_(audio|video)_stream 的区别在于 add_basic_(audio|video)_stream
构建了过滤表达式并将其传递给相同的底层
实现。所有 add_basic_(audio|video)_stream 可以通过
add_(audio|video)_stream 实现。
注意
当应用自定义滤镜时,客户端代码必须将 音频/视频流转换为torchaudio 可以转换为张量格式的格式之一。 例如,可以通过将
format=pix_fmts=rgb24应用于视频流并aformat=sample_fmts=fltp应用于音频流来实现这一点。每个输出流都有独立的滤波器图。因此,无法在滤波器表达式中使用不同的输入/输出流。不过,可以将一个输入流拆分为多个流,并在之后将其合并。
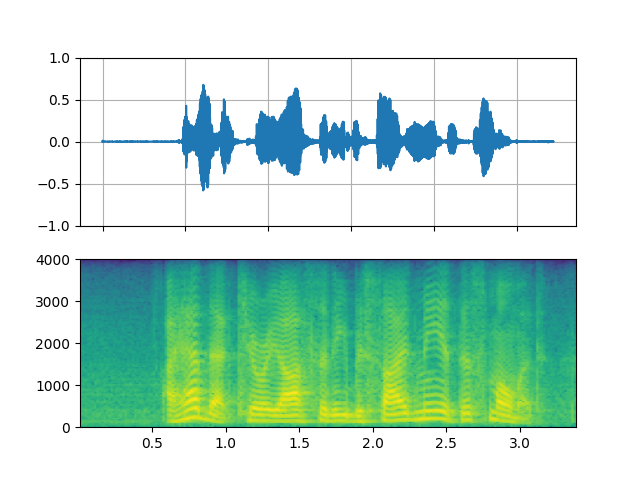
音频示例
# fmt: off
descs = [
    # No filtering
    "anull",
    # Apply a highpass filter then a lowpass filter
    "highpass=f=200,lowpass=f=1000",
    # Manipulate spectrogram
    (
        "afftfilt="
        "real='hypot(re,im)*sin(0)':"
        "imag='hypot(re,im)*cos(0)':"
        "win_size=512:"
        "overlap=0.75"
    ),
    # Manipulate spectrogram
    (
        "afftfilt="
        "real='hypot(re,im)*cos((random(0)*2-1)*2*3.14)':"
        "imag='hypot(re,im)*sin((random(1)*2-1)*2*3.14)':"
        "win_size=128:"
        "overlap=0.8"
    ),
]
# fmt: on
sample_rate = 8000

streamer = StreamReader(AUDIO_URL)
for desc in descs:
    streamer.add_audio_stream(
        frames_per_chunk=40000,
        filter_desc=f"aresample={sample_rate},{desc},aformat=sample_fmts=fltp",
    )

chunks = next(streamer.stream())


def _display(i):
    print("filter_desc:", streamer.get_out_stream_info(i).filter_description)
    _, axs = plt.subplots(2, 1)
    waveform = chunks[i][:, 0]
    axs[0].plot(waveform)
    axs[0].grid(True)
    axs[0].set_ylim([-1, 1])
    plt.setp(axs[0].get_xticklabels(), visible=False)
    axs[1].specgram(waveform, Fs=sample_rate)
    return IPython.display.Audio(chunks[i].T, rate=sample_rate)
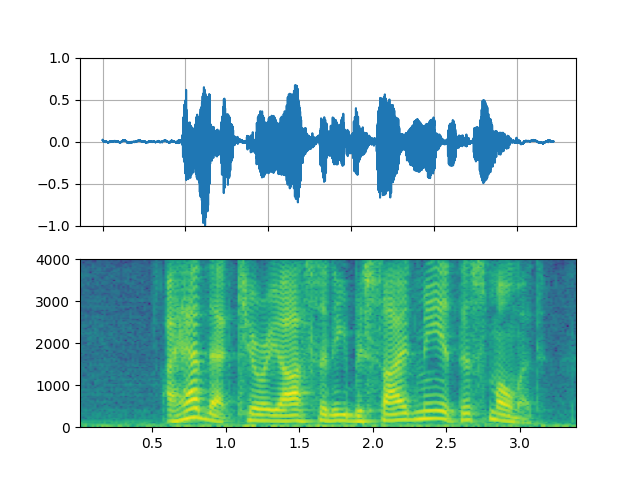
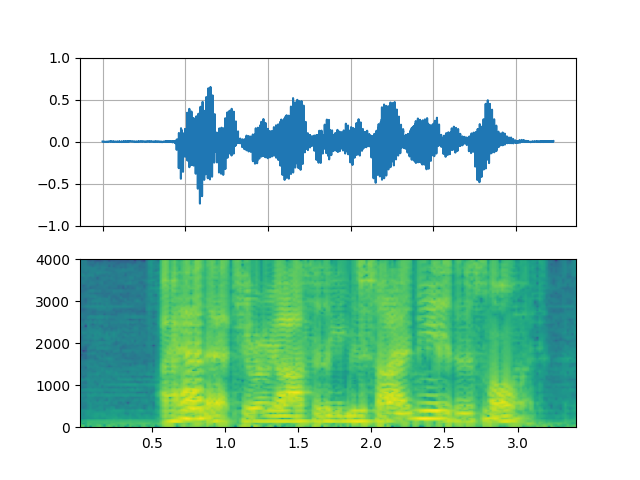
高通 / 低通滤波器
_display(1)
Out:
filter_desc: aresample=8000,highpass=f=200,lowpass=f=1000,aformat=sample_fmts=fltp
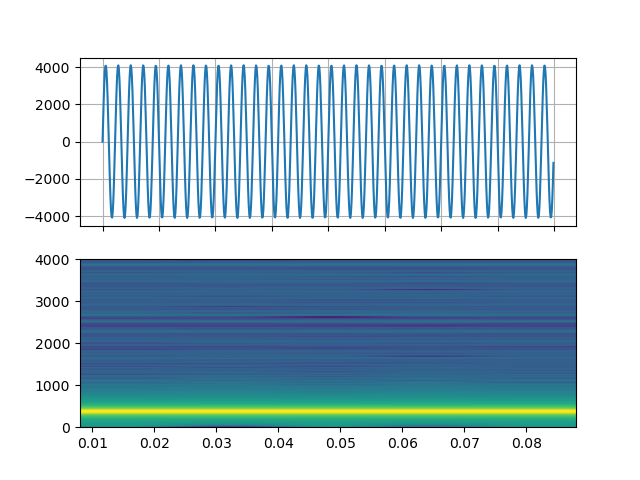
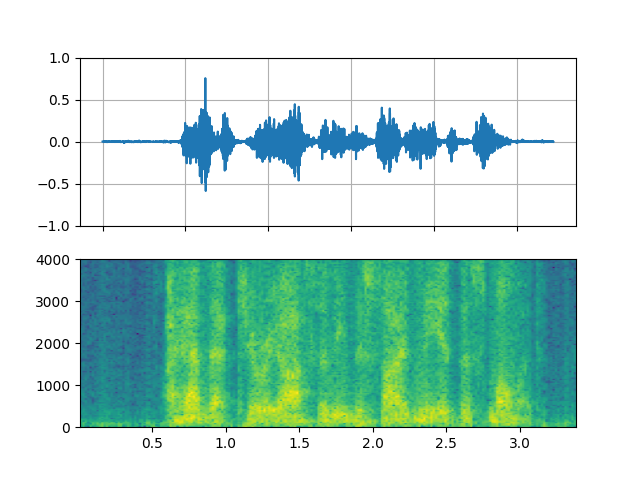
FFT滤波器 - 机器人 🤖
_display(2)
Out:
filter_desc: aresample=8000,afftfilt=real='hypot(re,im)*sin(0)':imag='hypot(re,im)*cos(0)':win_size=512:overlap=0.75,aformat=sample_fmts=fltp
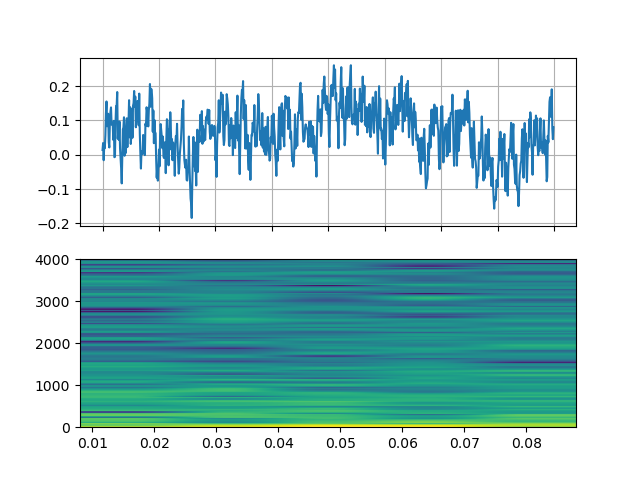
FFT滤波器 - Whisper
_display(3)
Out:
filter_desc: aresample=8000,afftfilt=real='hypot(re,im)*cos((random(0)*2-1)*2*3.14)':imag='hypot(re,im)*sin((random(1)*2-1)*2*3.14)':win_size=128:overlap=0.8,aformat=sample_fmts=fltp
视频示例
# fmt: off
descs = [
    # No effect
    "null",
    # Split the input stream and apply horizontal flip to the right half.
    (
        "split [main][tmp];"
        "[tmp] crop=iw/2:ih:0:0, hflip [flip];"
        "[main][flip] overlay=W/2:0"
    ),
    # Edge detection
    "edgedetect=mode=canny",
    # Rotate image by randomly and fill the background with brown
    "rotate=angle=-random(1)*PI:fillcolor=brown",
    # Manipulate pixel values based on the coordinate
    "geq=r='X/W*r(X,Y)':g='(1-X/W)*g(X,Y)':b='(H-Y)/H*b(X,Y)'"
]
# fmt: on
streamer = StreamReader(VIDEO_URL)
for desc in descs:
    streamer.add_video_stream(
        frames_per_chunk=30,
        filter_desc=f"fps=10,{desc},format=pix_fmts=rgb24",
    )

streamer.seek(12)

chunks = next(streamer.stream())


def _display(i):
    print("filter_desc:", streamer.get_out_stream_info(i).filter_description)
    _, axs = plt.subplots(1, 3, figsize=(8, 1.9))
    chunk = chunks[i]
    for j in range(3):
        axs[j].imshow(chunk[10 * j + 1].permute(1, 2, 0))
        axs[j].set_axis_off()
    plt.tight_layout()
    plt.show(block=False)
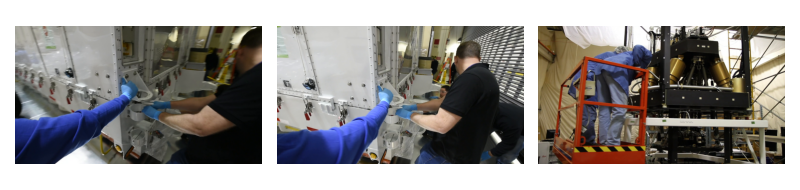
镜像
_display(1)
Out:
filter_desc: fps=10,split [main][tmp];[tmp] crop=iw/2:ih:0:0, hflip [flip];[main][flip] overlay=W/2:0,format=pix_fmts=rgb24

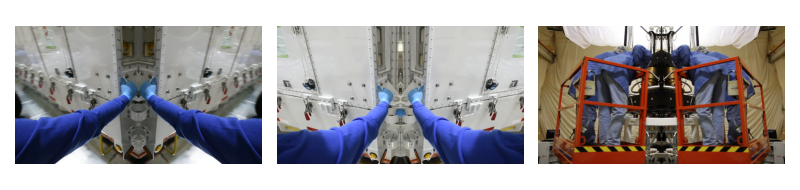
随机旋转
_display(3)
Out:
filter_desc: fps=10,rotate=angle=-random(1)*PI:fillcolor=brown,format=pix_fmts=rgb24
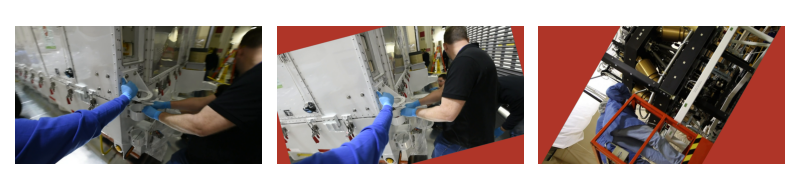
像素操作
_display(4)
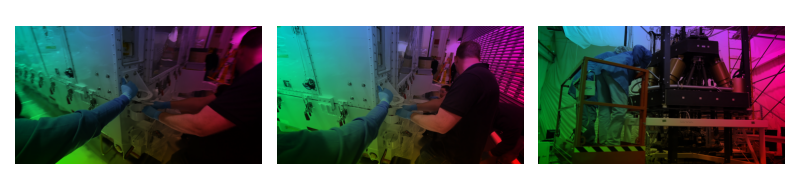
Out:
filter_desc: fps=10,geq=r='X/W*r(X,Y)':g='(1-X/W)*g(X,Y)':b='(H-Y)/H*b(X,Y)',format=pix_fmts=rgb24
脚本的总运行时间: ( 0 分钟 10.591 秒)