注意
点击 这里 下载完整示例代码
音频数据增强
torchaudio 提供多种增强音频数据的方法。
import torch
import torchaudio
import torchaudio.functional as F

print(torch.__version__)
print(torchaudio.__version__)
Out:
1.11.0+cpu
0.11.0+cpu
准备数据和实用函数(跳过此部分)
# @title Prepare data and utility functions. {display-mode: "form"}
# @markdown
# @markdown You do not need to look into this cell.
# @markdown Just execute once and you are good to go.
# @markdown
# @markdown In this tutorial, we will use a speech data from [VOiCES dataset](https://iqtlabs.github.io/voices/),
# @markdown which is licensed under Creative Commos BY 4.0.

# -------------------------------------------------------------------------------
# Preparation of data and helper functions.
# -------------------------------------------------------------------------------

import math
import os

import matplotlib.pyplot as plt
import requests
from IPython.display import Audio, display


_SAMPLE_DIR = "_assets"

SAMPLE_WAV_URL = "https://pytorch-tutorial-assets.s3.amazonaws.com/steam-train-whistle-daniel_simon.wav"
SAMPLE_WAV_PATH = os.path.join(_SAMPLE_DIR, "steam.wav")

SAMPLE_RIR_URL = "https://pytorch-tutorial-assets.s3.amazonaws.com/VOiCES_devkit/distant-16k/room-response/rm1/impulse/Lab41-SRI-VOiCES-rm1-impulse-mc01-stu-clo.wav"  # noqa: E501
SAMPLE_RIR_PATH = os.path.join(_SAMPLE_DIR, "rir.wav")

SAMPLE_WAV_SPEECH_URL = "https://pytorch-tutorial-assets.s3.amazonaws.com/VOiCES_devkit/source-16k/train/sp0307/Lab41-SRI-VOiCES-src-sp0307-ch127535-sg0042.wav"  # noqa: E501
SAMPLE_WAV_SPEECH_PATH = os.path.join(_SAMPLE_DIR, "speech.wav")

SAMPLE_NOISE_URL = "https://pytorch-tutorial-assets.s3.amazonaws.com/VOiCES_devkit/distant-16k/distractors/rm1/babb/Lab41-SRI-VOiCES-rm1-babb-mc01-stu-clo.wav"  # noqa: E501
SAMPLE_NOISE_PATH = os.path.join(_SAMPLE_DIR, "bg.wav")

os.makedirs(_SAMPLE_DIR, exist_ok=True)


def _fetch_data():
    uri = [
        (SAMPLE_WAV_URL, SAMPLE_WAV_PATH),
        (SAMPLE_RIR_URL, SAMPLE_RIR_PATH),
        (SAMPLE_WAV_SPEECH_URL, SAMPLE_WAV_SPEECH_PATH),
        (SAMPLE_NOISE_URL, SAMPLE_NOISE_PATH),
    ]
    for url, path in uri:
        with open(path, "wb") as file_:
            file_.write(requests.get(url).content)


_fetch_data()


def _get_sample(path, resample=None):
    effects = [["remix", "1"]]
    if resample:
        effects.extend(
            [
                ["lowpass", f"{resample // 2}"],
                ["rate", f"{resample}"],
            ]
        )
    return torchaudio.sox_effects.apply_effects_file(path, effects=effects)


def get_sample(*, resample=None):
    return _get_sample(SAMPLE_WAV_PATH, resample=resample)


def get_speech_sample(*, resample=None):
    return _get_sample(SAMPLE_WAV_SPEECH_PATH, resample=resample)


def plot_waveform(waveform, sample_rate, title="Waveform", xlim=None, ylim=None):
    waveform = waveform.numpy()

    num_channels, num_frames = waveform.shape
    time_axis = torch.arange(0, num_frames) / sample_rate

    figure, axes = plt.subplots(num_channels, 1)
    if num_channels == 1:
        axes = [axes]
    for c in range(num_channels):
        axes[c].plot(time_axis, waveform[c], linewidth=1)
        axes[c].grid(True)
        if num_channels > 1:
            axes[c].set_ylabel(f"Channel {c+1}")
        if xlim:
            axes[c].set_xlim(xlim)
        if ylim:
            axes[c].set_ylim(ylim)
    figure.suptitle(title)
    plt.show(block=False)


def print_stats(waveform, sample_rate=None, src=None):
    if src:
        print("-" * 10)
        print("Source:", src)
        print("-" * 10)
    if sample_rate:
        print("Sample Rate:", sample_rate)
    print("Shape:", tuple(waveform.shape))
    print("Dtype:", waveform.dtype)
    print(f" - Max:     {waveform.max().item():6.3f}")
    print(f" - Min:     {waveform.min().item():6.3f}")
    print(f" - Mean:    {waveform.mean().item():6.3f}")
    print(f" - Std Dev: {waveform.std().item():6.3f}")
    print()
    print(waveform)
    print()


def plot_specgram(waveform, sample_rate, title="Spectrogram", xlim=None):
    waveform = waveform.numpy()

    num_channels, num_frames = waveform.shape

    figure, axes = plt.subplots(num_channels, 1)
    if num_channels == 1:
        axes = [axes]
    for c in range(num_channels):
        axes[c].specgram(waveform[c], Fs=sample_rate)
        if num_channels > 1:
            axes[c].set_ylabel(f"Channel {c+1}")
        if xlim:
            axes[c].set_xlim(xlim)
    figure.suptitle(title)
    plt.show(block=False)


def play_audio(waveform, sample_rate):
    waveform = waveform.numpy()

    num_channels, num_frames = waveform.shape
    if num_channels == 1:
        return Audio(waveform[0], rate=sample_rate)
    elif num_channels == 2:
        return Audio((waveform[0], waveform[1]), rate=sample_rate)
    else:
        raise ValueError("Waveform with more than 2 channels are not supported.")


def get_rir_sample(*, resample=None, processed=False):
    rir_raw, sample_rate = _get_sample(SAMPLE_RIR_PATH, resample=resample)
    if not processed:
        return rir_raw, sample_rate
    rir = rir_raw[:, int(sample_rate * 1.01) : int(sample_rate * 1.3)]
    rir = rir / torch.norm(rir, p=2)
    rir = torch.flip(rir, [1])
    return rir, sample_rate


def get_noise_sample(*, resample=None):
    return _get_sample(SAMPLE_NOISE_PATH, resample=resample)
应用效果和过滤
torchaudio.sox_effects() 允许直接应用类似于
sox 中可用的过滤器到 Tensor 对象和文件对象音频源。
有两个函数可用于此目的:
torchaudio.sox_effects.apply_effects_tensor()用于将效果应用于 Tensor。torchaudio.sox_effects.apply_effects_file()用于对其他音频源应用效果。
这两个函数都接受形式为
List[List[str]]的效果定义。
这与 sox 命令的工作方式基本一致,但有一个注意事项是
sox 会自动添加一些效果,而 torchaudio 的
实现则不会。
有关可用效果的列表,请参阅sox文档。
提示 如果您需要即时加载和重采样音频数据,
则可以使用 torchaudio.sox_effects.apply_effects_file()
配合效果器 "rate"。
注意 torchaudio.sox_effects.apply_effects_file() 接受类文件对象或类路径对象。
与 torchaudio.load() 类似,当无法从文件扩展名或文件头推断音频格式时,您可以提供参数 format 来指定音频源的格式。
注意 此过程不可微。
# Load the data
waveform1, sample_rate1 = get_sample(resample=16000)

# Define effects
effects = [
    ["lowpass", "-1", "300"],  # apply single-pole lowpass filter
    ["speed", "0.8"],  # reduce the speed
    # This only changes sample rate, so it is necessary to
    # add `rate` effect with original sample rate after this.
    ["rate", f"{sample_rate1}"],
    ["reverb", "-w"],  # Reverbration gives some dramatic feeling
]

# Apply effects
waveform2, sample_rate2 = torchaudio.sox_effects.apply_effects_tensor(waveform1, sample_rate1, effects)

print_stats(waveform1, sample_rate=sample_rate1, src="Original")
print_stats(waveform2, sample_rate=sample_rate2, src="Effects Applied")
Out:
----------
Source: Original
----------
Sample Rate: 16000
Shape: (1, 39680)
Dtype: torch.float32
 - Max:      0.507
 - Min:     -0.448
 - Mean:    -0.000
 - Std Dev:  0.122

tensor([[ 0.0007,  0.0076,  0.0122,  ..., -0.0049, -0.0025,  0.0020]])

----------
Source: Effects Applied
----------
Sample Rate: 16000
Shape: (2, 49600)
Dtype: torch.float32
 - Max:      0.091
 - Min:     -0.091
 - Mean:    -0.000
 - Std Dev:  0.021

tensor([[0.0000, 0.0000, 0.0000,  ..., 0.0069, 0.0058, 0.0045],
        [0.0000, 0.0000, 0.0000,  ..., 0.0085, 0.0085, 0.0085]])
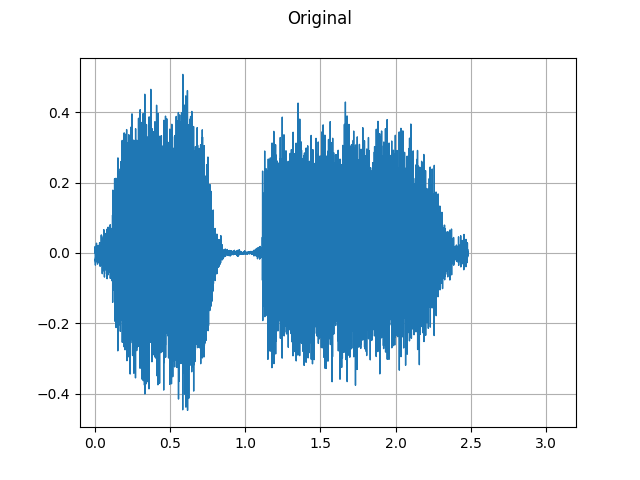
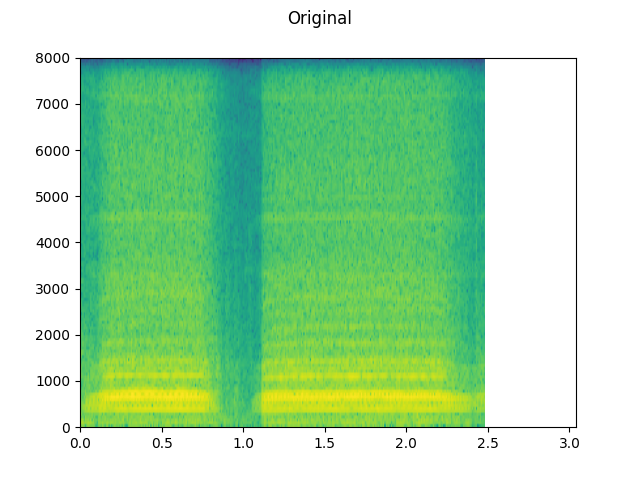
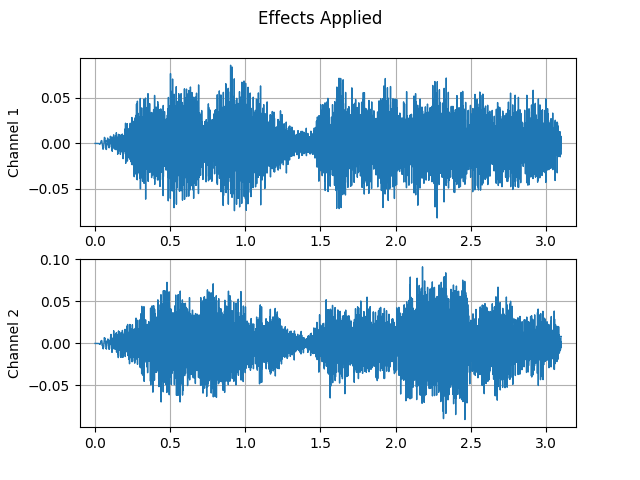
请注意,应用效果后,帧数和通道数与原始数据不同。让我们来听一下音频。
Original:
plot_waveform(waveform1, sample_rate1, title="Original", xlim=(-0.1, 3.2))
plot_specgram(waveform1, sample_rate1, title="Original", xlim=(0, 3.04))
play_audio(waveform1, sample_rate1)
已应用的效果:
plot_waveform(waveform2, sample_rate2, title="Effects Applied", xlim=(-0.1, 3.2))
plot_specgram(waveform2, sample_rate2, title="Effects Applied", xlim=(0, 3.04))
play_audio(waveform2, sample_rate2)
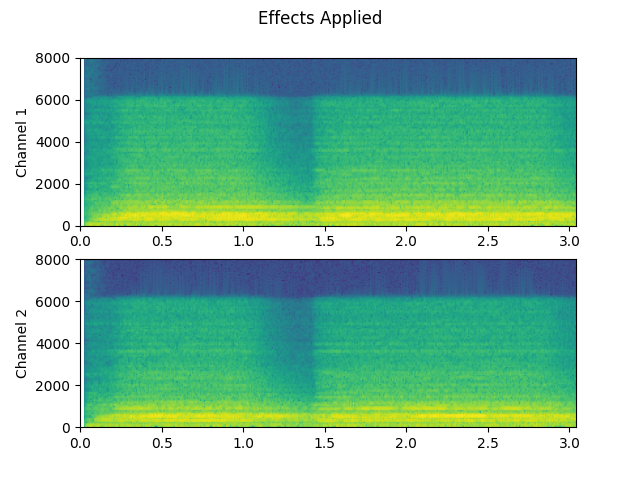
听起来不是更戏剧化了吗?
模拟房间混响
卷积混响 是一种用于使干净音频听起来像是在不同环境中生成的技术。
例如,使用房间脉冲响应(RIR),我们可以使清晰的语音听起来就像是在会议室中发出的一样。
为此过程,我们需要混响(RIR)数据。以下数据来自 VOiCES 数据集,但你也可以自己录制——只需打开麦克风并拍手即可。
sample_rate = 8000

rir_raw, _ = get_rir_sample(resample=sample_rate)

plot_waveform(rir_raw, sample_rate, title="Room Impulse Response (raw)", ylim=None)
plot_specgram(rir_raw, sample_rate, title="Room Impulse Response (raw)")
play_audio(rir_raw, sample_rate)
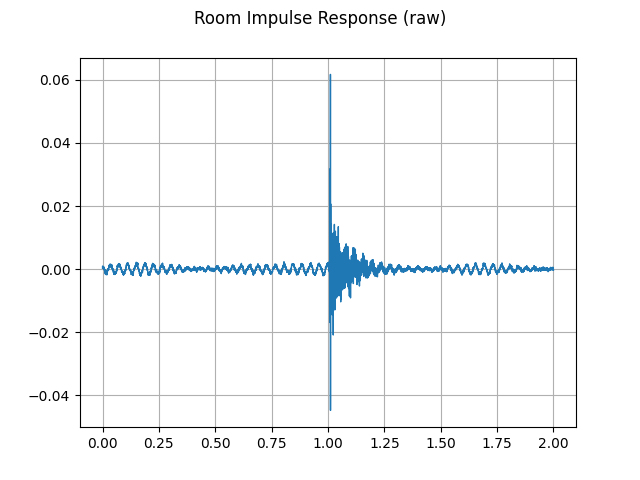
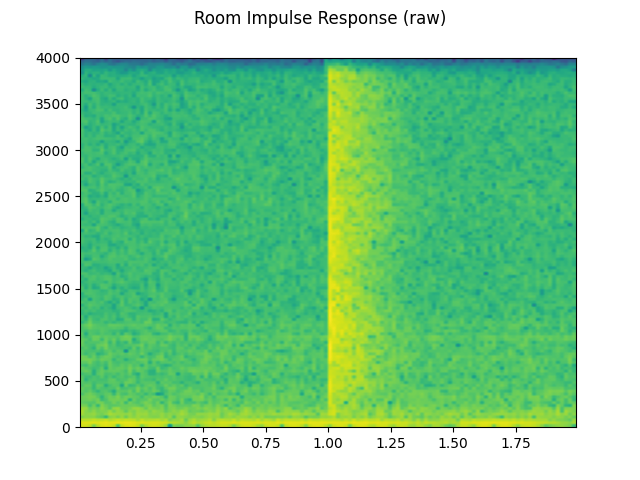
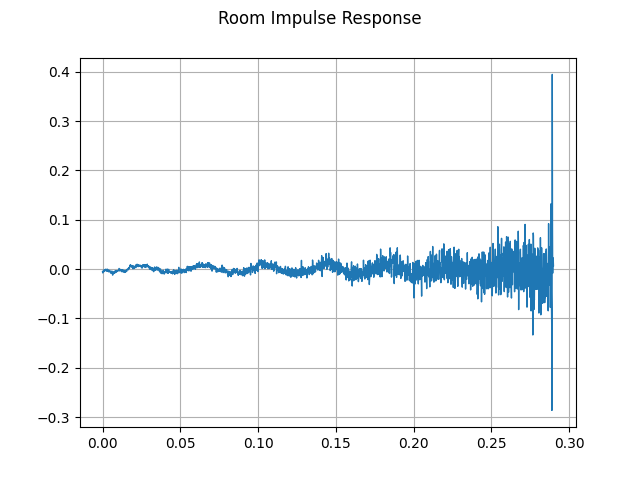
首先,我们需要对 RIR 进行清理。我们提取主脉冲,归一化信号功率,然后沿时间轴翻转。
rir = rir_raw[:, int(sample_rate * 1.01) : int(sample_rate * 1.3)]
rir = rir / torch.norm(rir, p=2)
rir = torch.flip(rir, [1])

print_stats(rir)
plot_waveform(rir, sample_rate, title="Room Impulse Response", ylim=None)
Out:
Shape: (1, 2320)
Dtype: torch.float32
 - Max:      0.395
 - Min:     -0.286
 - Mean:    -0.000
 - Std Dev:  0.021

tensor([[-0.0052, -0.0076, -0.0071,  ...,  0.0184,  0.0173,  0.0070]])
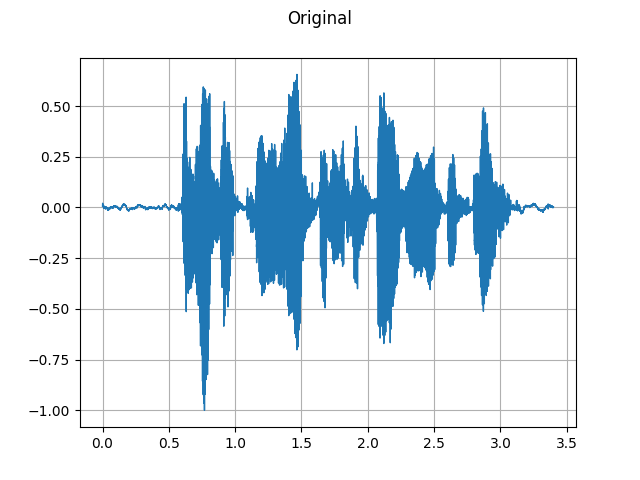
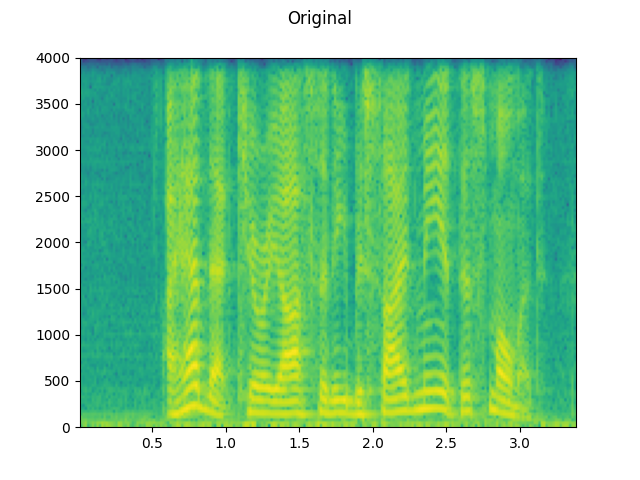
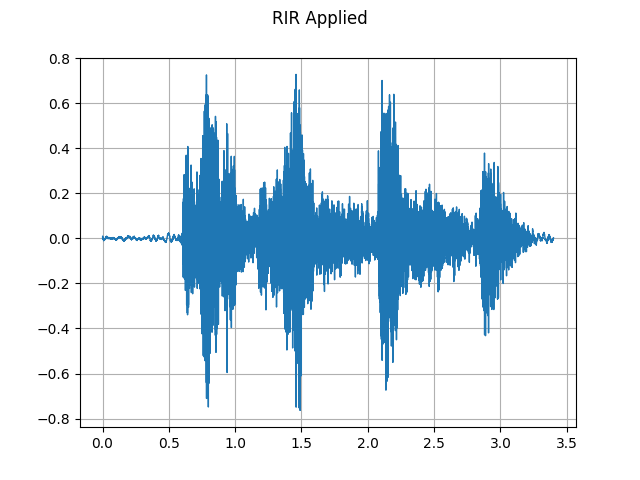
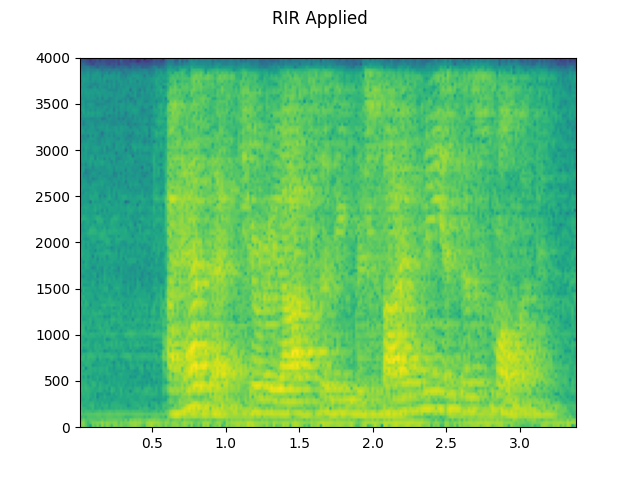
然后,我们将语音信号与 RIR 滤波器进行卷积。
speech, _ = get_speech_sample(resample=sample_rate)

speech_ = torch.nn.functional.pad(speech, (rir.shape[1] - 1, 0))
augmented = torch.nn.functional.conv1d(speech_[None, ...], rir[None, ...])[0]
Original:
plot_waveform(speech, sample_rate, title="Original", ylim=None)
plot_specgram(speech, sample_rate, title="Original")
play_audio(speech, sample_rate)
已应用RIR:
plot_waveform(augmented, sample_rate, title="RIR Applied", ylim=None)
plot_specgram(augmented, sample_rate, title="RIR Applied")
play_audio(augmented, sample_rate)
添加背景噪声
要向音频数据添加背景噪声,您可以简单地将噪声张量添加到表示音频数据的张量中。调整噪声强度的一种常见方法是更改信噪比 (SNR)。 [wikipedia]
$$ \mathrm{信噪比} = \frac{P_{信号}}{P_{噪声}} $$
$$ \mathrm{SNR_{dB}} = 10 \log _{{10}} \mathrm {SNR} $$
sample_rate = 8000
speech, _ = get_speech_sample(resample=sample_rate)
noise, _ = get_noise_sample(resample=sample_rate)
noise = noise[:, : speech.shape[1]]

speech_power = speech.norm(p=2)
noise_power = noise.norm(p=2)

snr_dbs = [20, 10, 3]
noisy_speeches = []
for snr_db in snr_dbs:
    snr = math.exp(snr_db / 10)
    scale = snr * noise_power / speech_power
    noisy_speeches.append((scale * speech + noise) / 2)
背景噪声:
plot_waveform(noise, sample_rate, title="Background noise")
plot_specgram(noise, sample_rate, title="Background noise")
play_audio(noise, sample_rate)
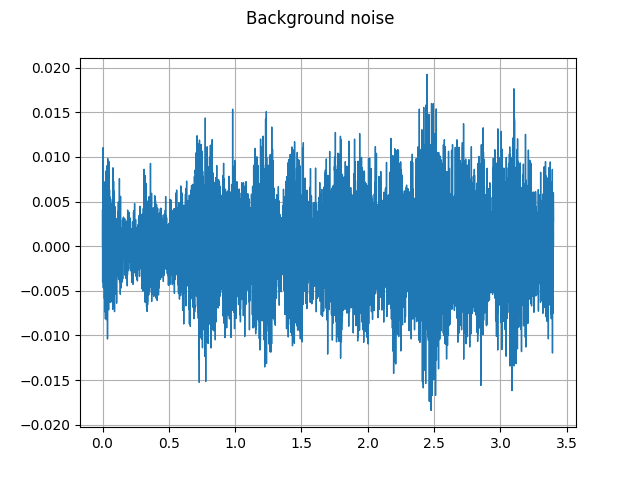
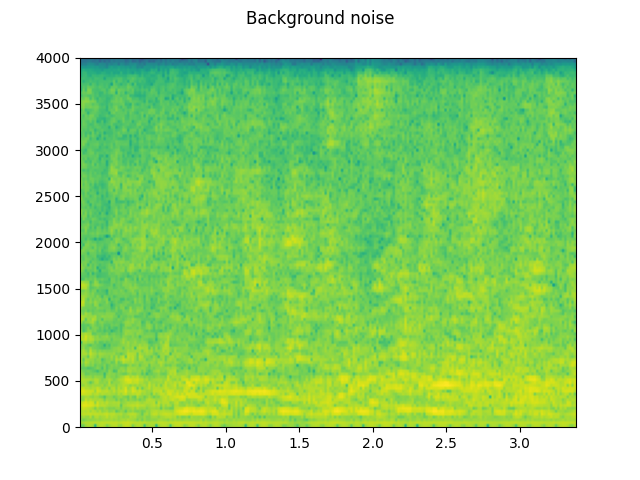
信噪比 20 dB:
snr_db, noisy_speech = snr_dbs[0], noisy_speeches[0]
plot_waveform(noisy_speech, sample_rate, title=f"SNR: {snr_db} [dB]")
plot_specgram(noisy_speech, sample_rate, title=f"SNR: {snr_db} [dB]")
play_audio(noisy_speech, sample_rate)
![SNR: 20 [dB]](https://pytorch.org/audio/0.11.0/_images/sphx_glr_audio_data_augmentation_tutorial_014.png)
![SNR: 20 [dB]](https://pytorch.org/audio/0.11.0/_images/sphx_glr_audio_data_augmentation_tutorial_015.png)
信噪比 10 dB:
snr_db, noisy_speech = snr_dbs[1], noisy_speeches[1]
plot_waveform(noisy_speech, sample_rate, title=f"SNR: {snr_db} [dB]")
plot_specgram(noisy_speech, sample_rate, title=f"SNR: {snr_db} [dB]")
play_audio(noisy_speech, sample_rate)
![SNR: 10 [dB]](https://pytorch.org/audio/0.11.0/_images/sphx_glr_audio_data_augmentation_tutorial_016.png)
![SNR: 10 [dB]](https://pytorch.org/audio/0.11.0/_images/sphx_glr_audio_data_augmentation_tutorial_017.png)
信噪比 3 dB:
snr_db, noisy_speech = snr_dbs[2], noisy_speeches[2]
plot_waveform(noisy_speech, sample_rate, title=f"SNR: {snr_db} [dB]")
plot_specgram(noisy_speech, sample_rate, title=f"SNR: {snr_db} [dB]")
play_audio(noisy_speech, sample_rate)
![SNR: 3 [dB]](https://pytorch.org/audio/0.11.0/_images/sphx_glr_audio_data_augmentation_tutorial_018.png)
![SNR: 3 [dB]](https://pytorch.org/audio/0.11.0/_images/sphx_glr_audio_data_augmentation_tutorial_019.png)
将编解码器应用于张量对象
torchaudio.functional.apply_codec() 可以将编解码器应用于
Tensor 对象。
注意 此过程不可微。
waveform, sample_rate = get_speech_sample(resample=8000)

plot_specgram(waveform, sample_rate, title="Original")

configs = [
    ({"format": "wav", "encoding": "ULAW", "bits_per_sample": 8}, "8 bit mu-law"),
    ({"format": "gsm"}, "GSM-FR"),
    ({"format": "mp3", "compression": -9}, "MP3"),
    ({"format": "vorbis", "compression": -1}, "Vorbis"),
]
waveforms = []
for param, title in configs:
    augmented = F.apply_codec(waveform, sample_rate, **param)
    plot_specgram(augmented, sample_rate, title=title)
    waveforms.append(augmented)
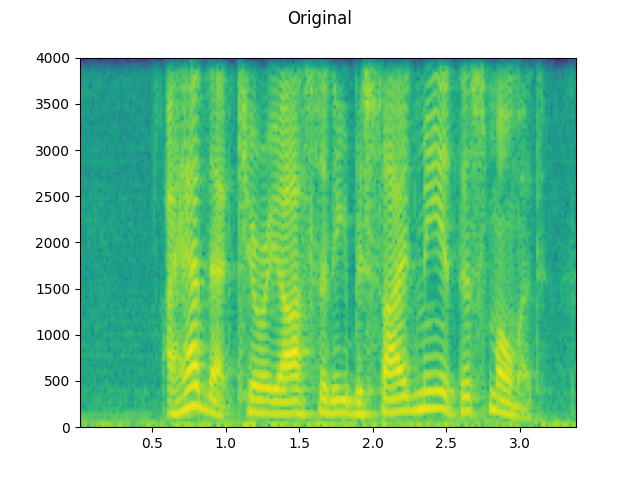
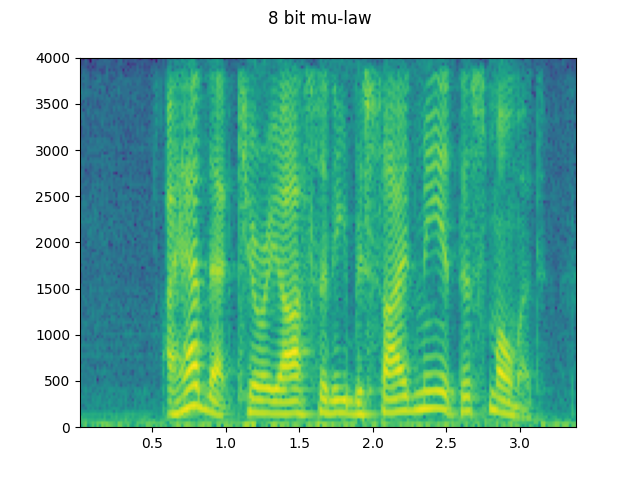
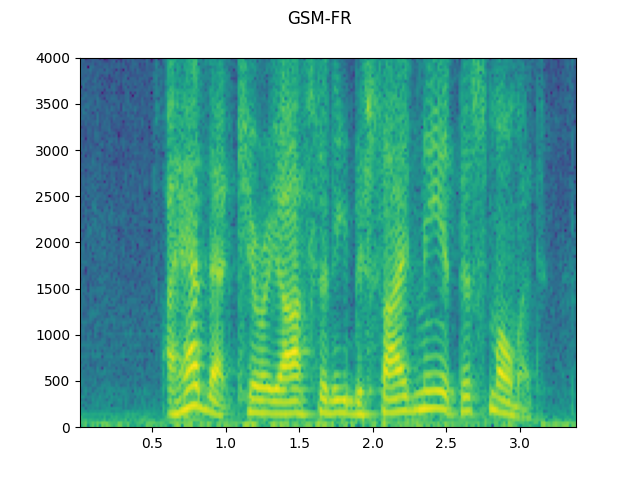
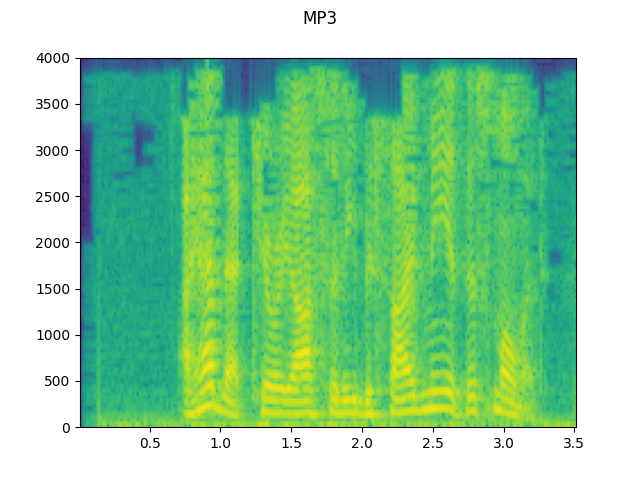
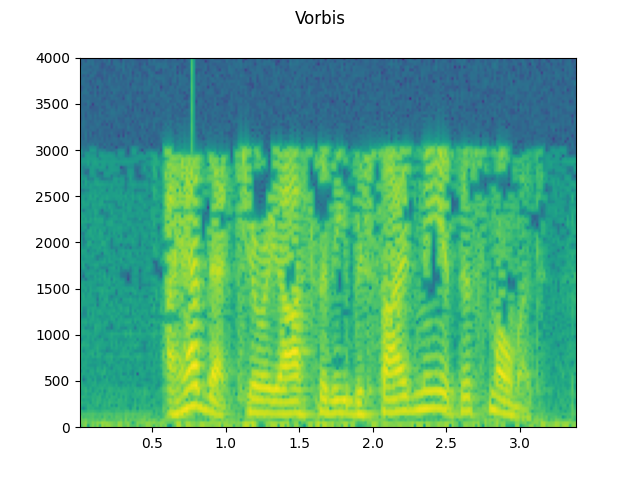
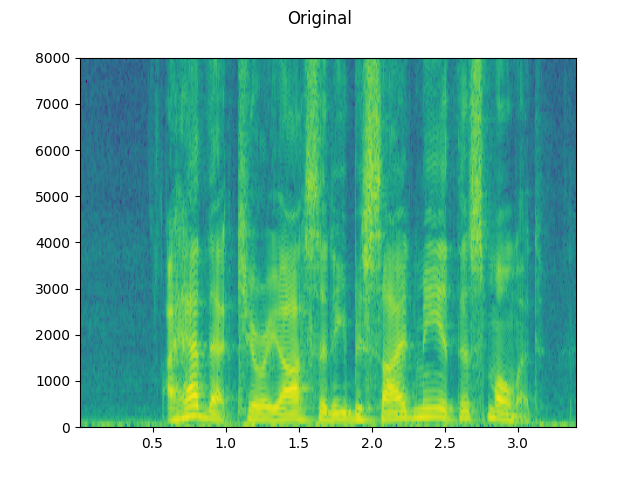
模拟手机录音
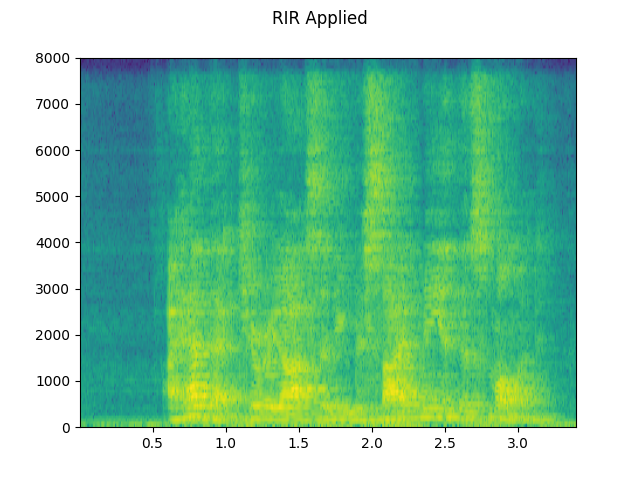
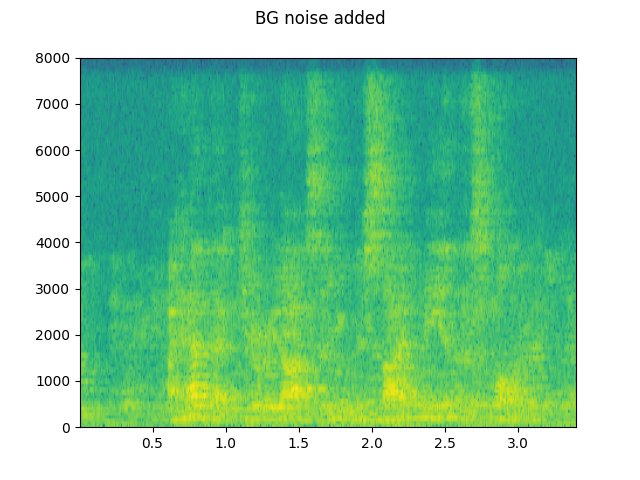
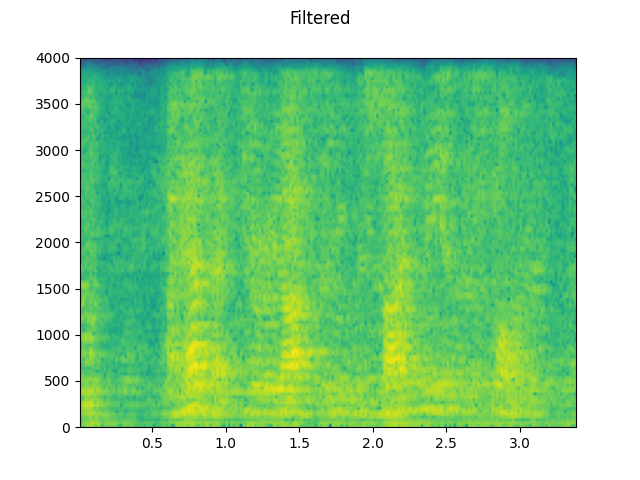
结合之前的技巧,我们可以模拟出听起来像一个人在回声较大的房间中通过电话讲话的音频,同时还有背景中人们交谈的声音。
sample_rate = 16000
original_speech, _ = get_speech_sample(resample=sample_rate)

plot_specgram(original_speech, sample_rate, title="Original")

# Apply RIR
rir, _ = get_rir_sample(resample=sample_rate, processed=True)
speech_ = torch.nn.functional.pad(original_speech, (rir.shape[1] - 1, 0))
rir_applied = torch.nn.functional.conv1d(speech_[None, ...], rir[None, ...])[0]

plot_specgram(rir_applied, sample_rate, title="RIR Applied")

# Add background noise
# Because the noise is recorded in the actual environment, we consider that
# the noise contains the acoustic feature of the environment. Therefore, we add
# the noise after RIR application.
noise, _ = get_noise_sample(resample=sample_rate)
noise = noise[:, : rir_applied.shape[1]]

snr_db = 8
scale = math.exp(snr_db / 10) * noise.norm(p=2) / rir_applied.norm(p=2)
bg_added = (scale * rir_applied + noise) / 2

plot_specgram(bg_added, sample_rate, title="BG noise added")

# Apply filtering and change sample rate
filtered, sample_rate2 = torchaudio.sox_effects.apply_effects_tensor(
    bg_added,
    sample_rate,
    effects=[
        ["lowpass", "4000"],
        [
            "compand",
            "0.02,0.05",
            "-60,-60,-30,-10,-20,-8,-5,-8,-2,-8",
            "-8",
            "-7",
            "0.05",
        ],
        ["rate", "8000"],
    ],
)

plot_specgram(filtered, sample_rate2, title="Filtered")

# Apply telephony codec
codec_applied = F.apply_codec(filtered, sample_rate2, format="gsm")

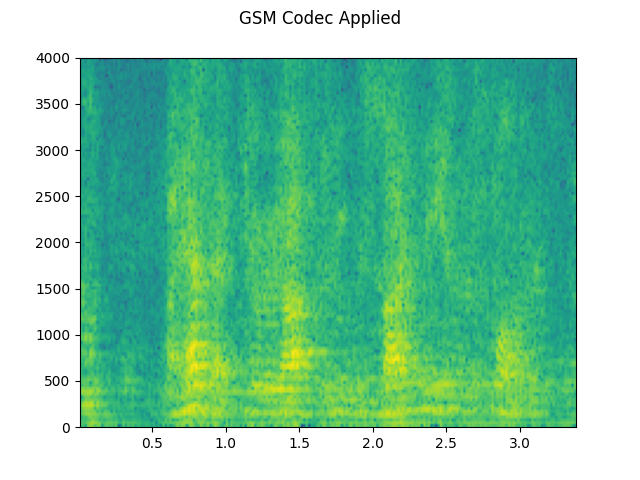
plot_specgram(codec_applied, sample_rate2, title="GSM Codec Applied")